Quick Fire Rapid keyboard mini review and repair
Mini review
Red vs. Brown switches
The Cooler Master Quick Fire Rapid CM Storm keyboard is, despite the ridiculous name, an excellent keyboard at a good value. It uses Cherry MX Red switches. I prefer it over my Leopold with Cherry MX Brown switches. The Browns have tacticle feedback (a “bump” at the point where the switch engages). To me, that just makes typing feel more “busy” and I don’t think the brain (at least not my brain) can actually use the extra information. With 65g of actuation force, the Brown switches are stiffer and after getting passed the “bump”, the key is likely to plunge all the way to the bottom. The Quick Fire, with the non-tactile Red switches has a much smoother feel and with 45g of actuation force, keys are easier to press.
Build quality
The build quality of the Quick Fire Rapid is excellent from a mechanical point of view but but only fair on the electronics. The keyboard is extremely stiff. Holding it by the left and right sides and twisting gives no flexing and no creacking. It is also heavy, as the switches are all mounted on a thick metal plate. It’s about the same weight as my Leopold keyboard, which is very similar in construction.
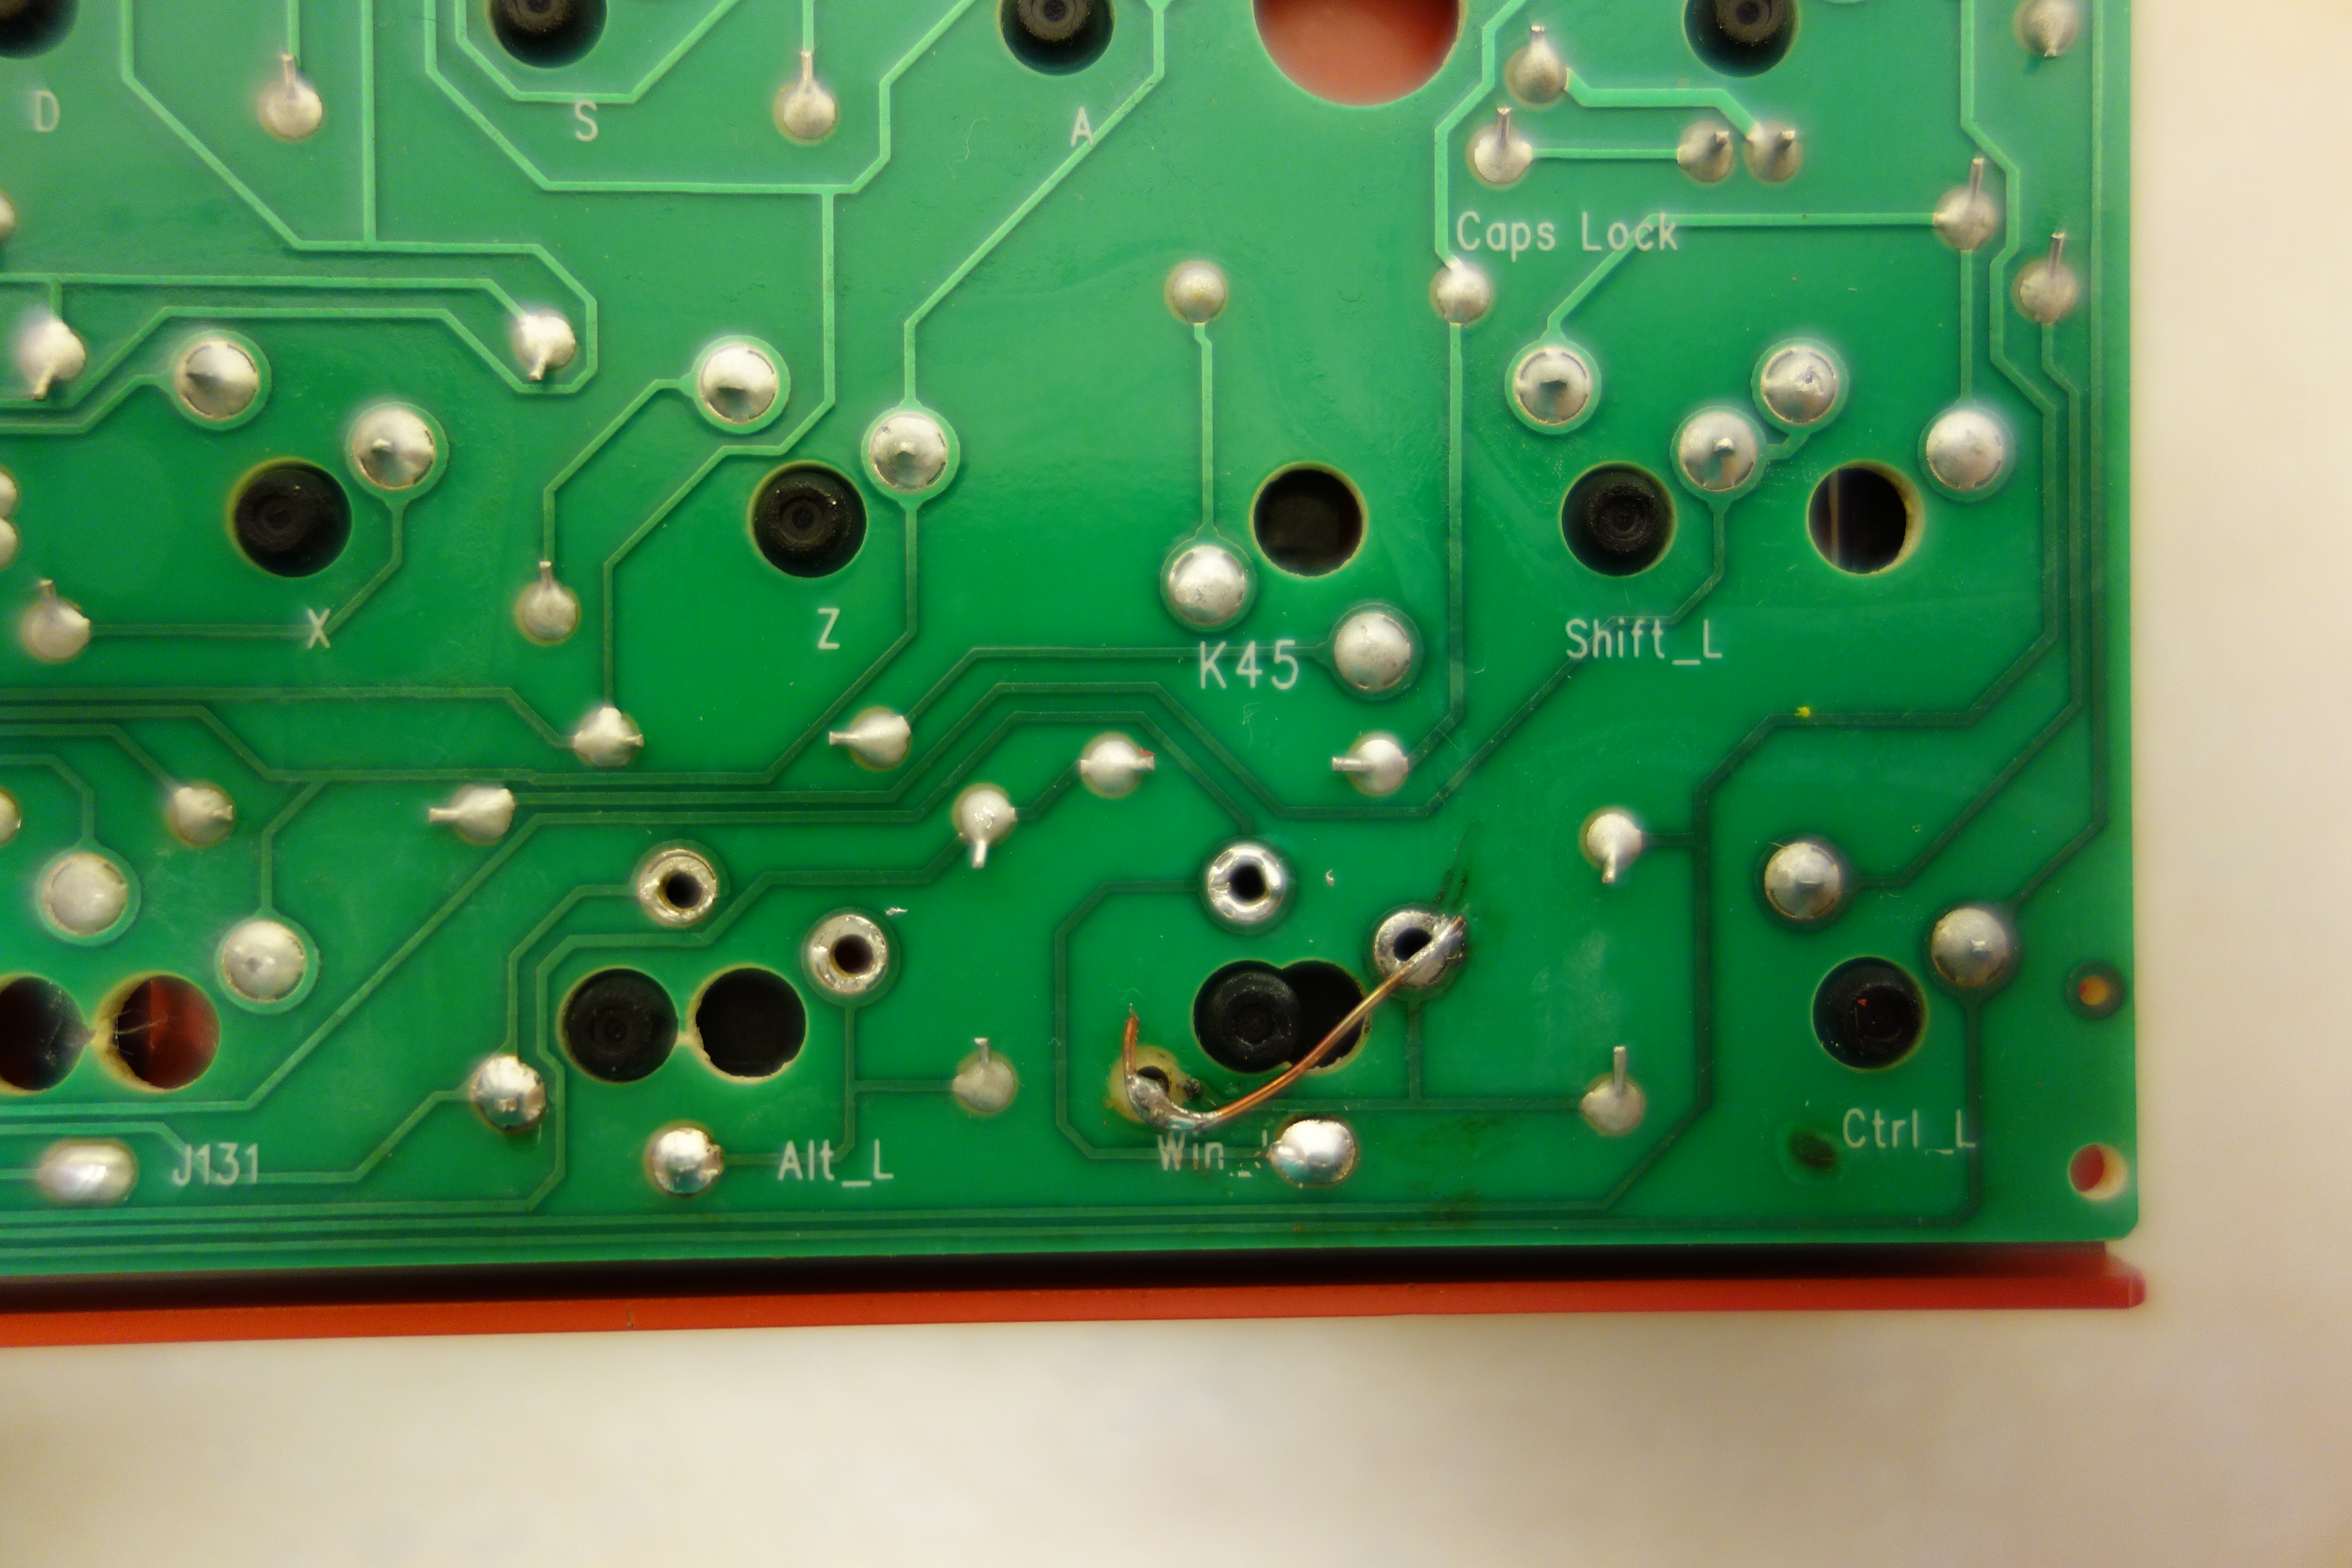
On the electronics side, things are a bit more iffy. The circuit board still has residue on it, which is a hallmark of cheap manufacturing in my experience. Also, QC is not great, as my keyboard arrived with a key that only worked intermittently. It turned out to be caused by a broken trace and a loose pad on the circuit board.
The surface of the keyboard itself (not the keys) has been coated with a rubbery material which gives it a nice texture.
There are media keys on F5 - F12, which can be activated with the FN key. The media keys have large, ugly looking white prints on them.
Key layout
Unfortunately, the Quick Fire Rapid deviates from the standard keyboard layout on one key. In the location where the Windows Context Menu key would normally be, there’s a function key. This key activates a rather silly function that allows blocking the Windows key during gaming and enables the F5 - F12 keys to be used as media keys.
Instead of making up for the missing Windows Context Menu by using the right Windows key for that purpose, they left the right Windows key as is. So the keyboard has two Windows key and no Windows Context Menu keys. I worked around this by using a keyboard mapping app to map the right Windows key to Context Menu.
Repair
To fix or to return, that’s the question
When the keyboard arrived, the left Windows key only worked intermittently, depending on where on the key cap it was pressed. It was obviously a mechanical issue so I figured that if the problem was likely to be on the circuit board or soldering, I’d void the warranty and repair it myself rather than going through the return procedure. If the problem was within the switch, I’d return it. To find out where the problem was, I popped off the key cap so that I could push on the base on the switch at the same time as I pushed the switch. In this way, I quickly determined that it was location of force on the base that determined when the switch would work. So I popped the keyboard open and desoldered the switch. When doing so, I found that the circuit board trace connecting one of the legs on the switch was cracked right at the soldering and that the pad was loose. That was easily fixed with a bodge.
Procedure
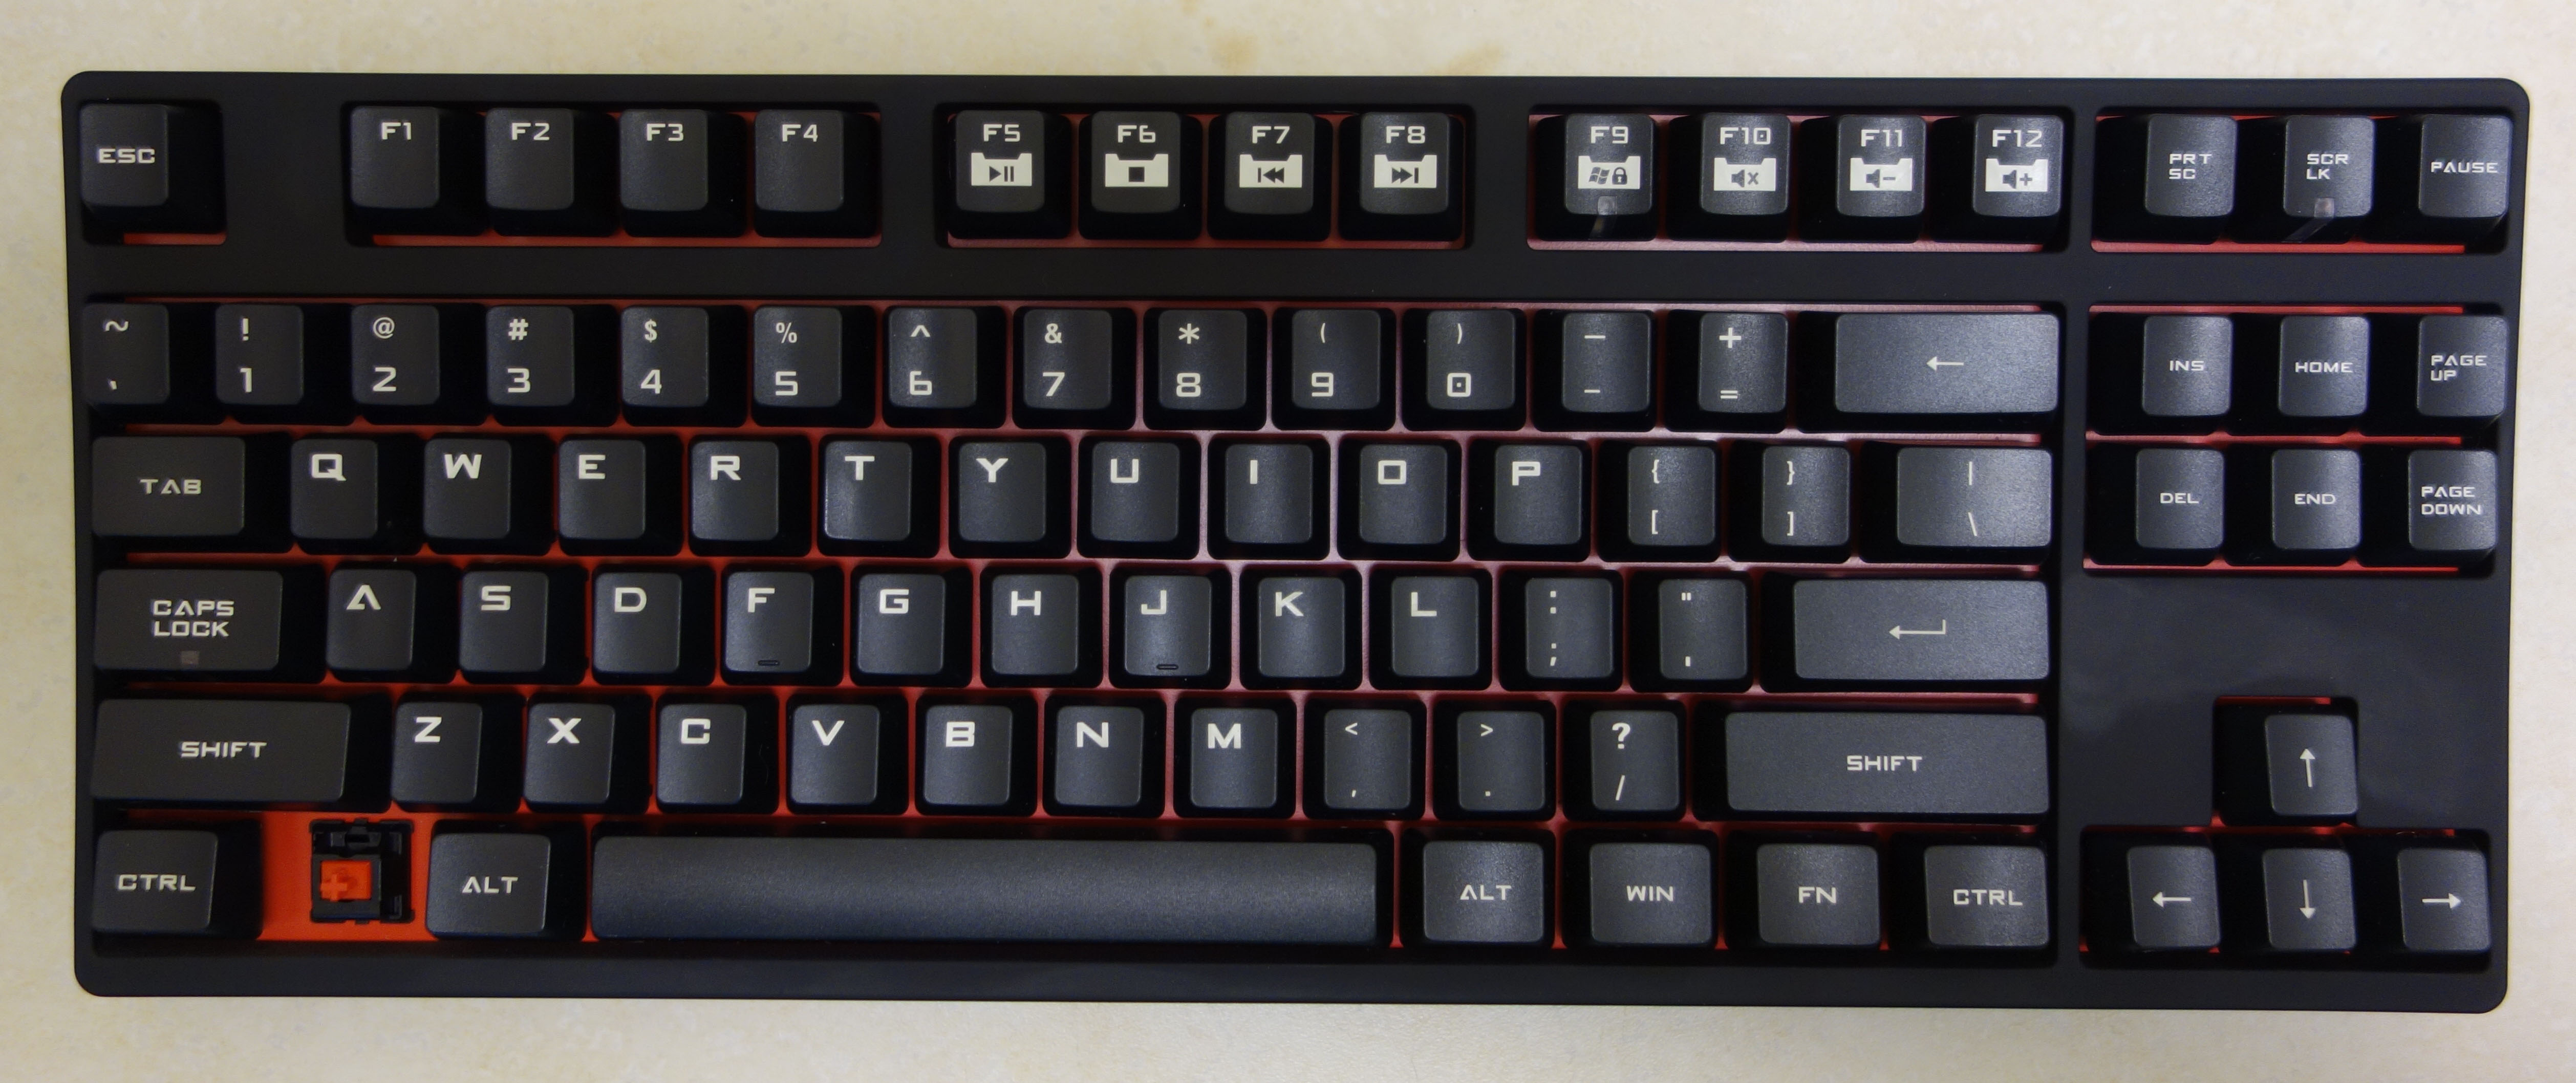
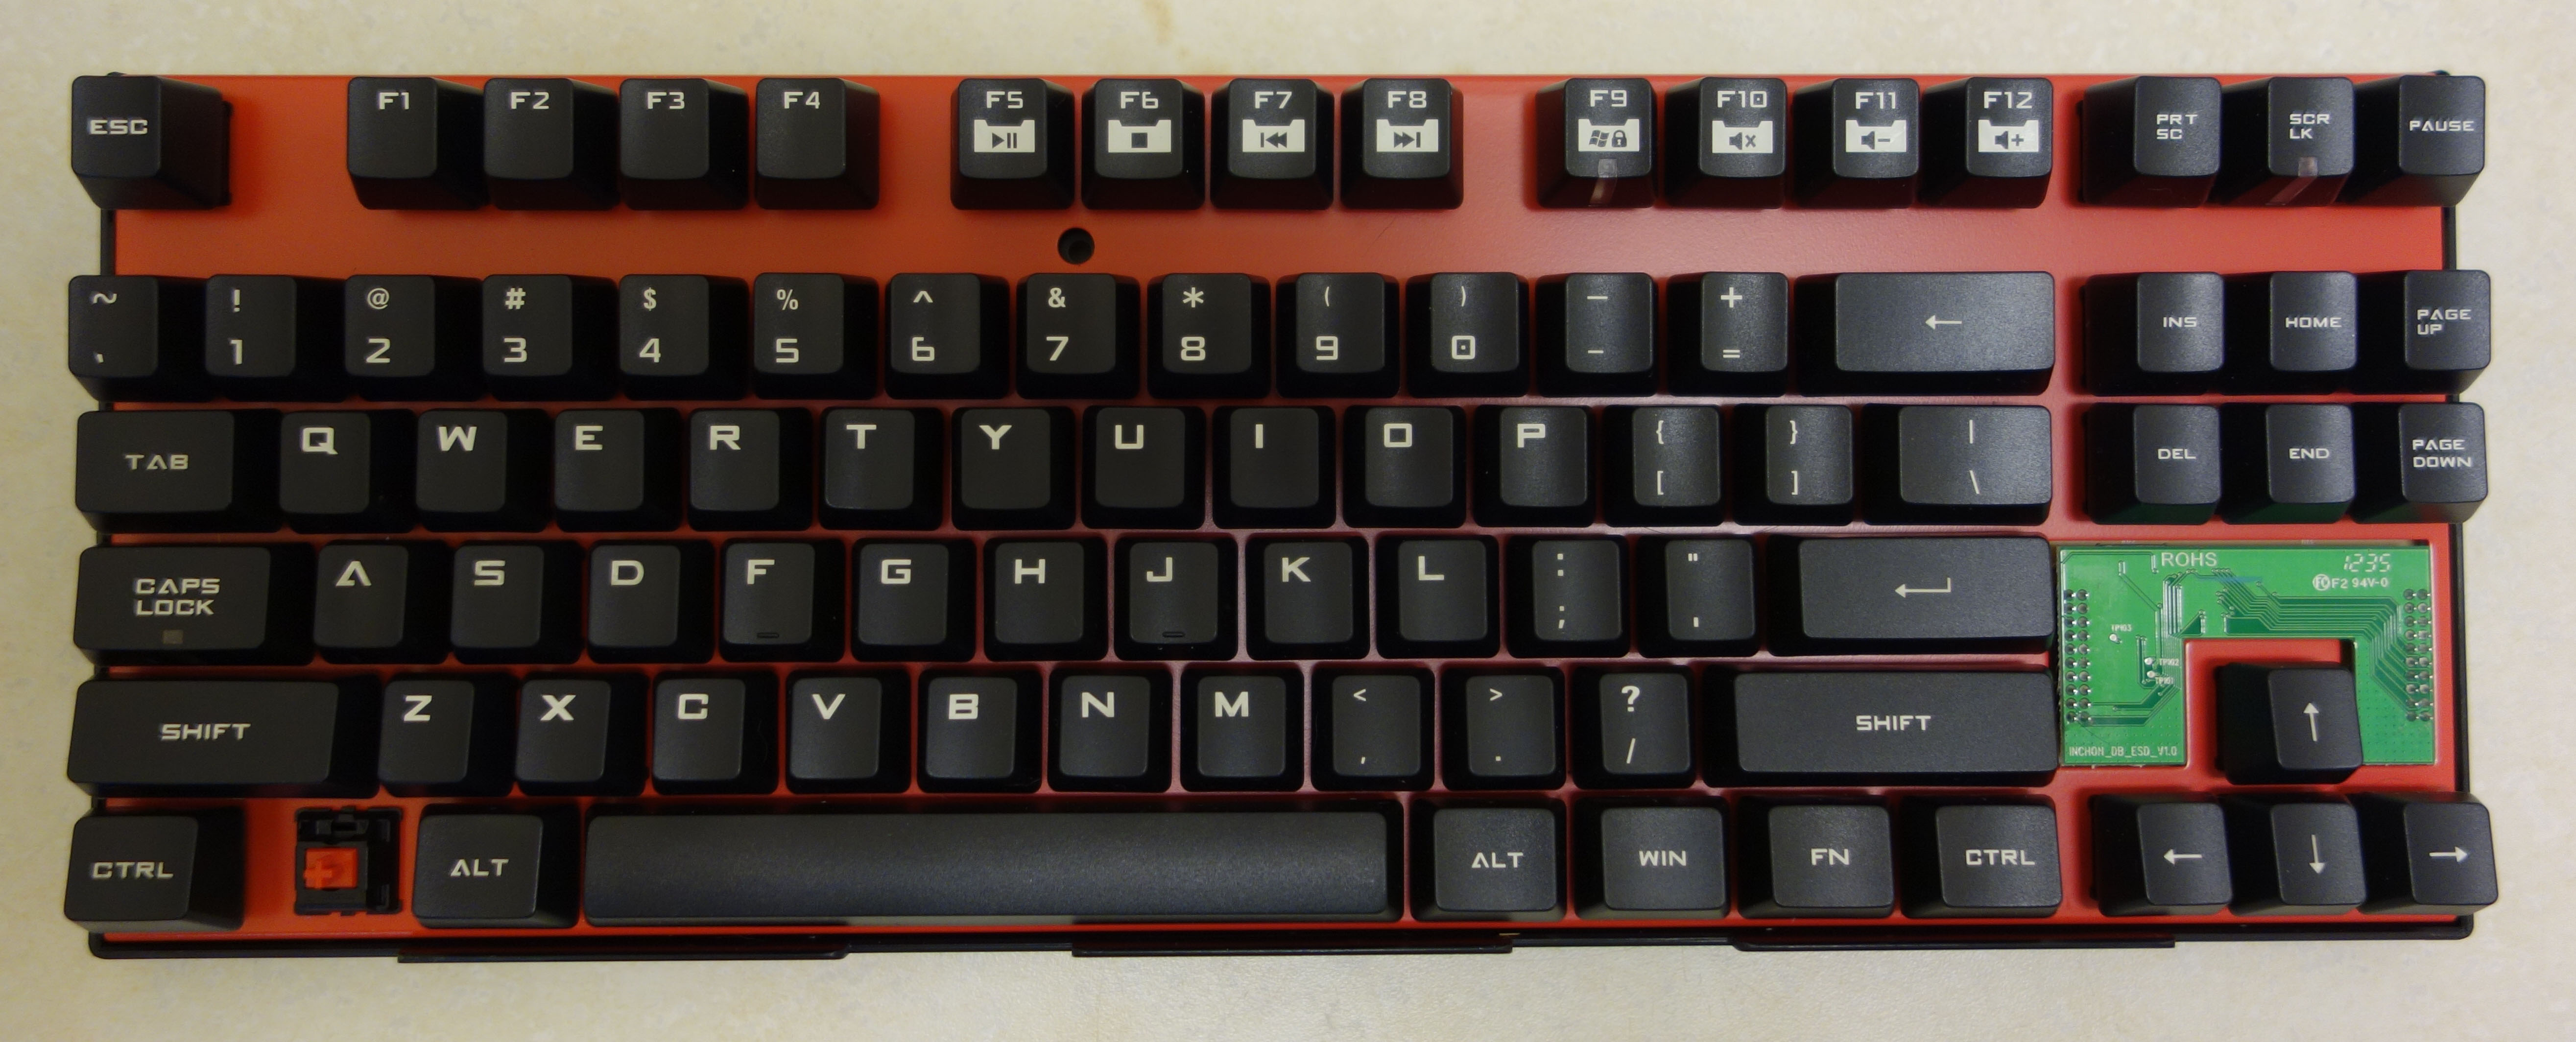
The gloriously named Cooler Master Quick Fire Rapid CM Storm with the key cap for my broken left Windows key removed.
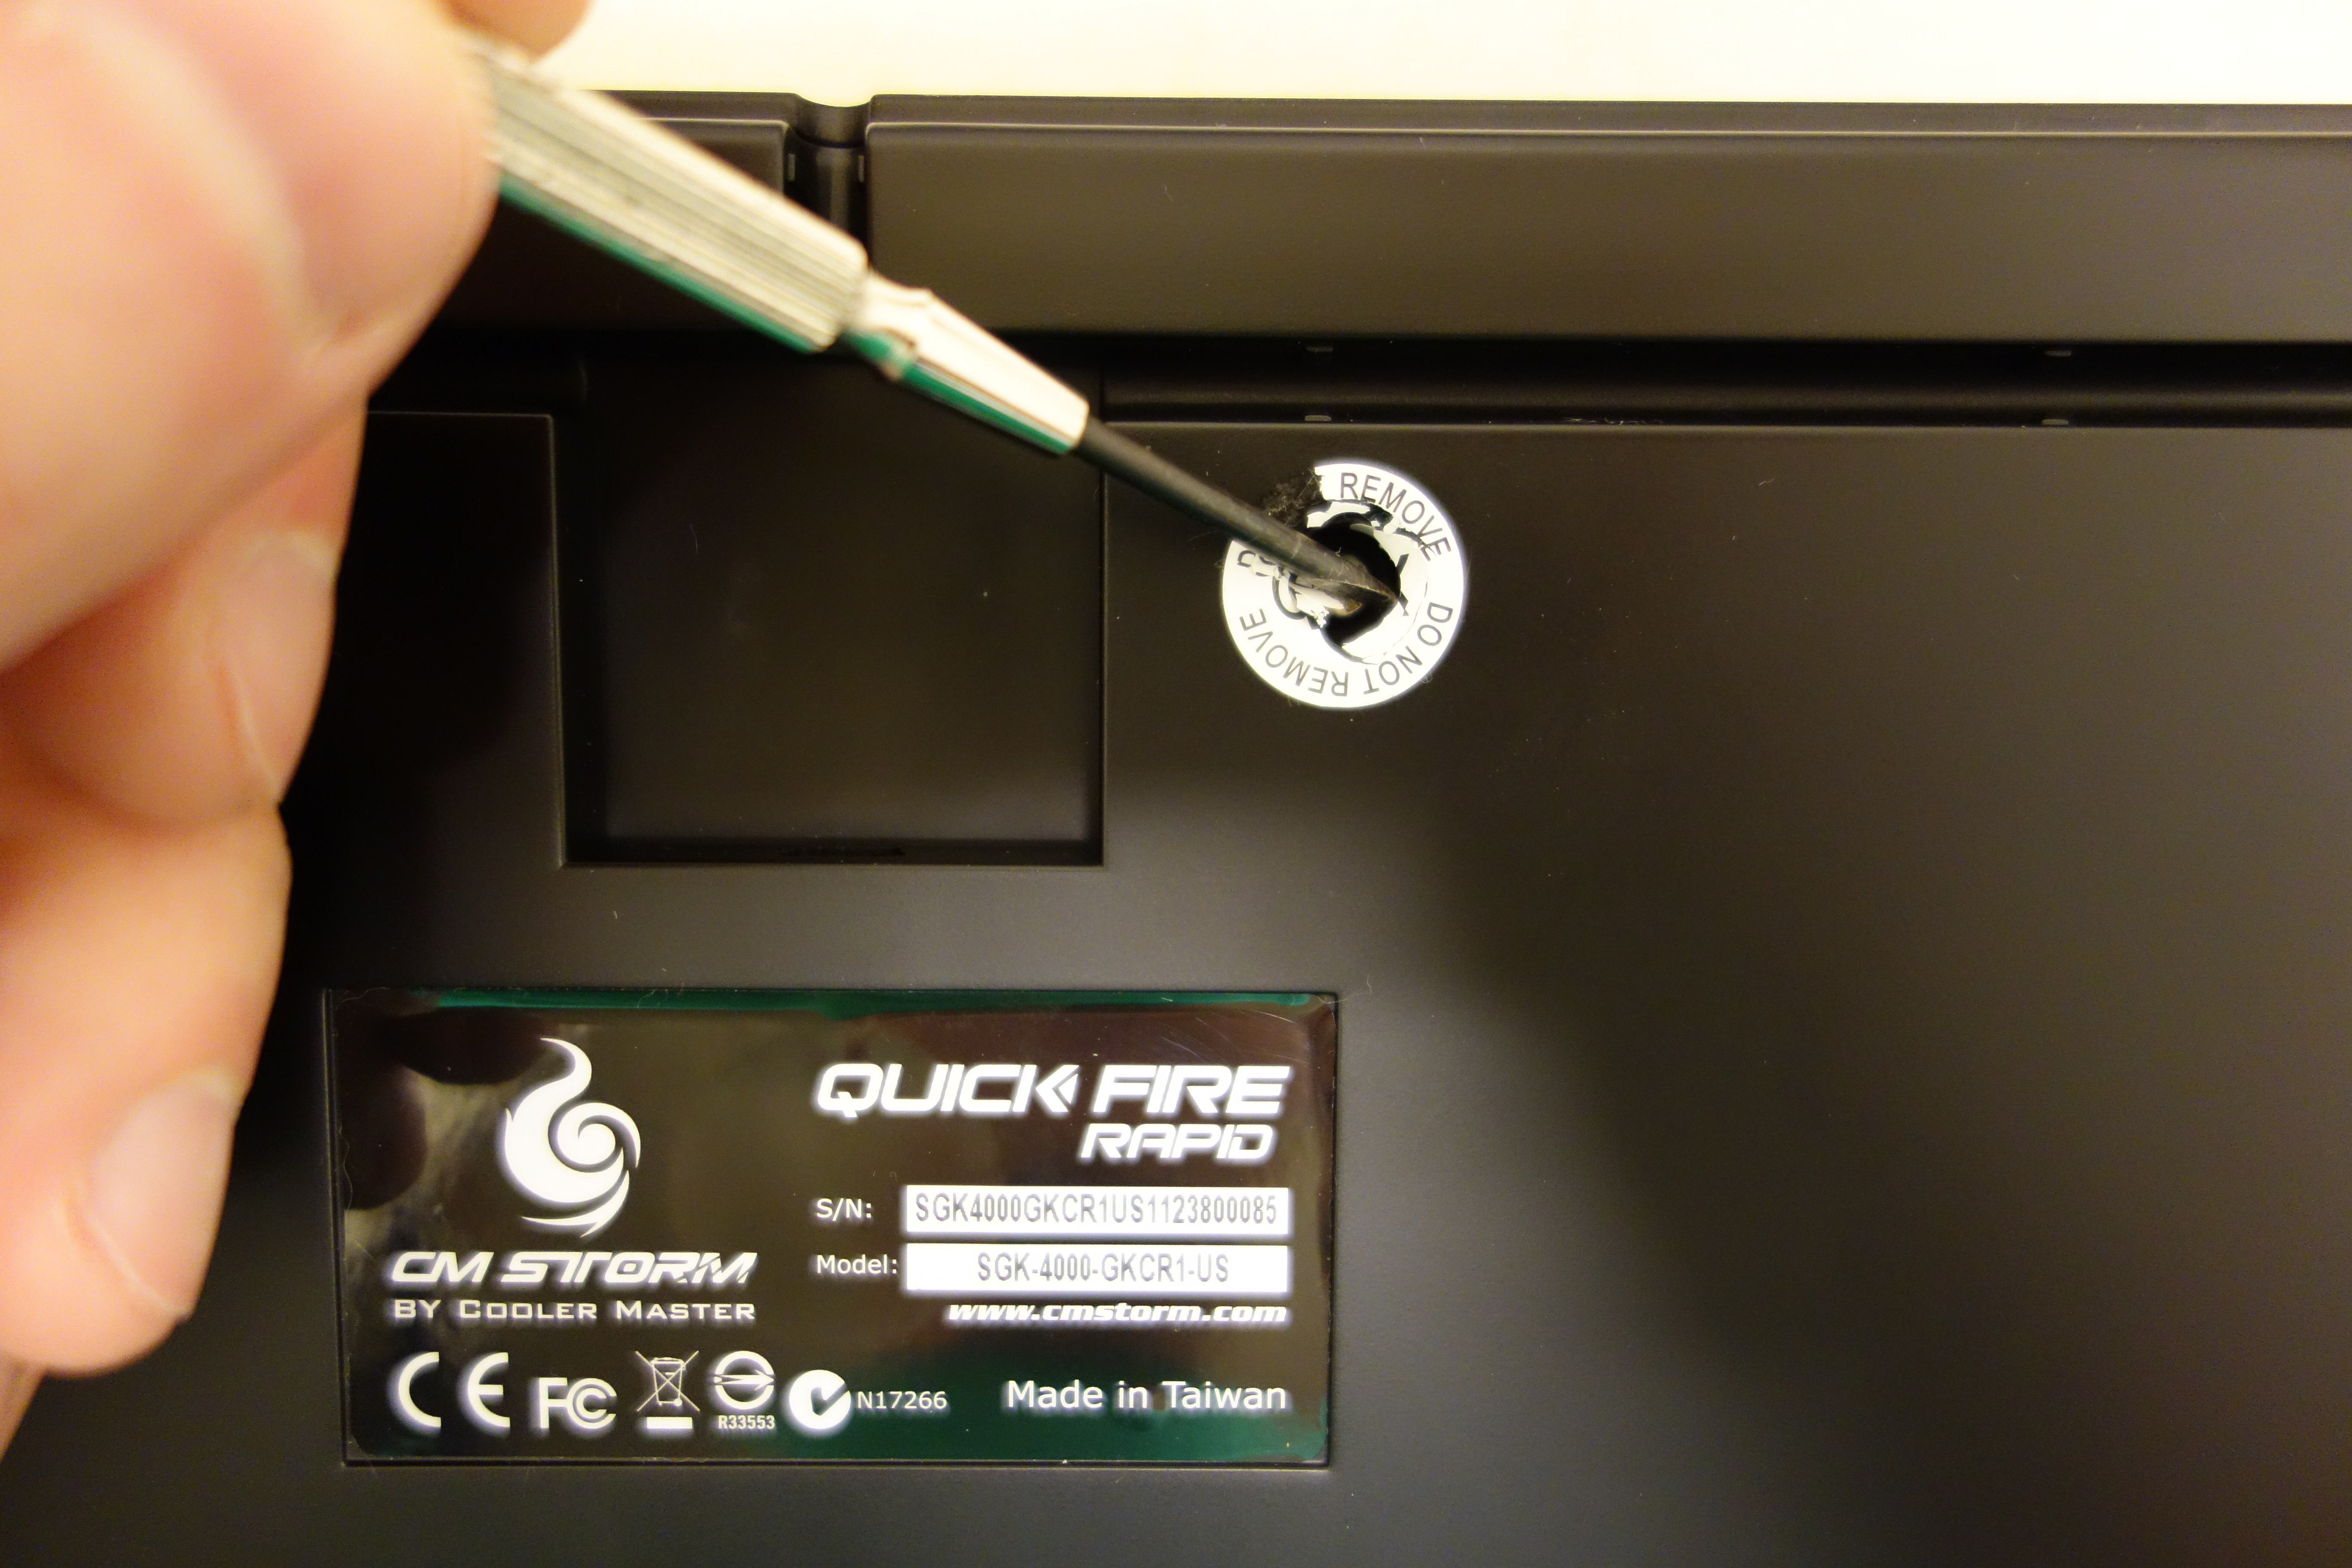
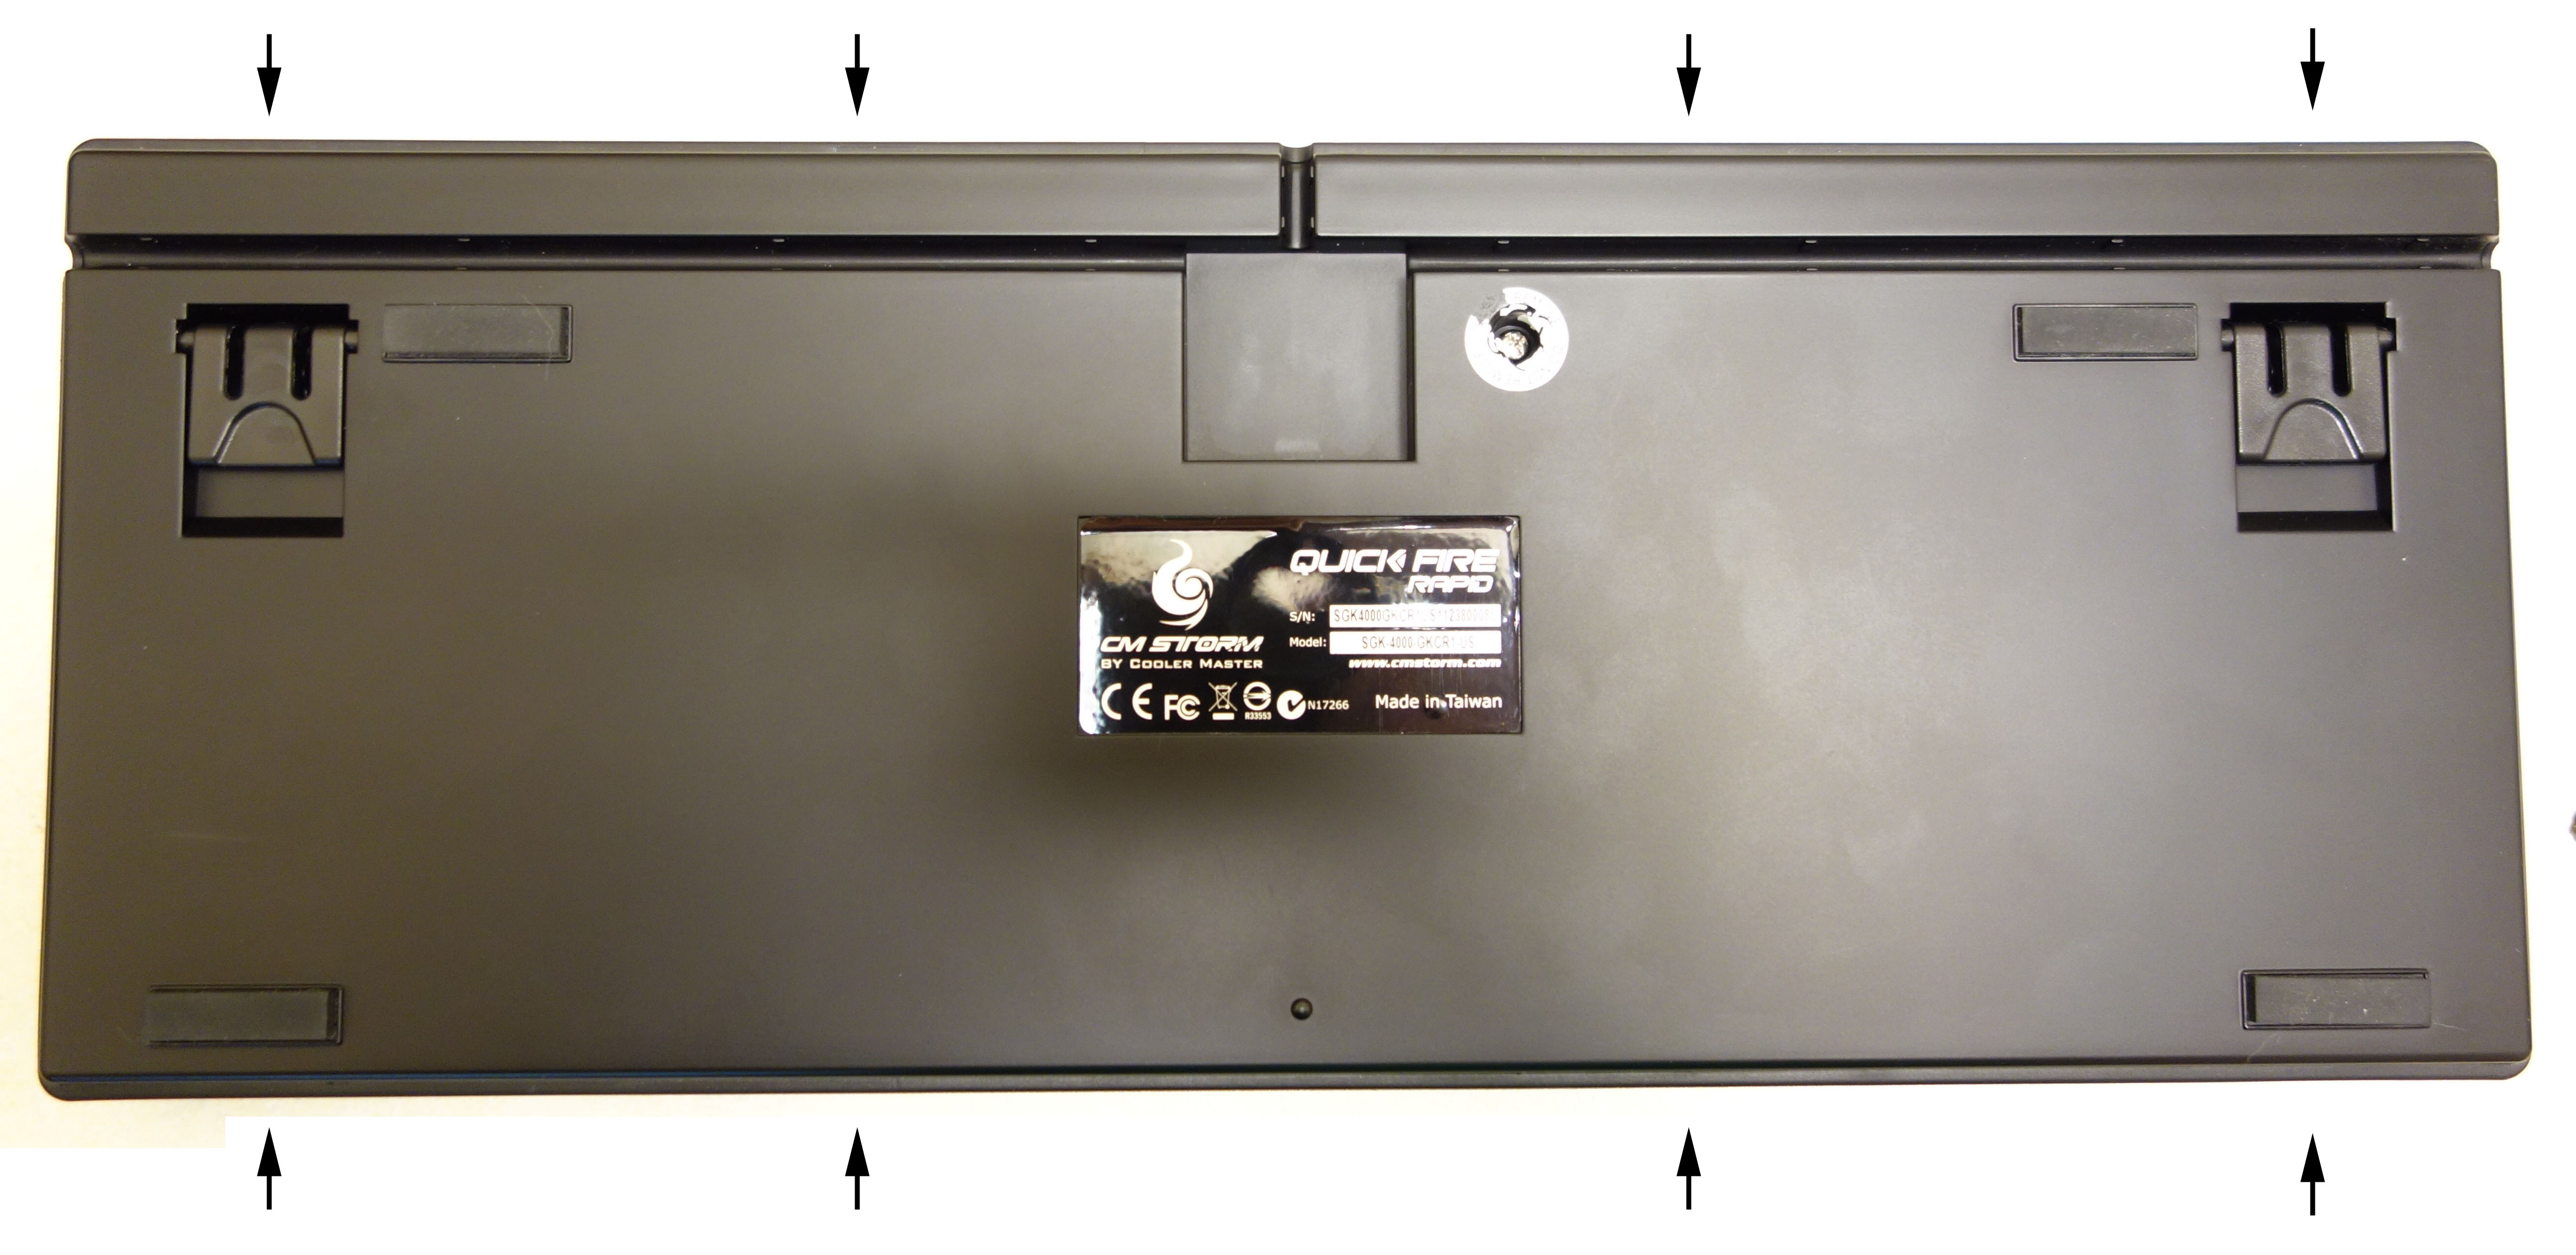
The only purpose of this screw is to screw anyone out of their warranty if they want to open the keyboard.
Approximate location of the tabs that hold the keyboard together. Ther are no tabs on the short sides.
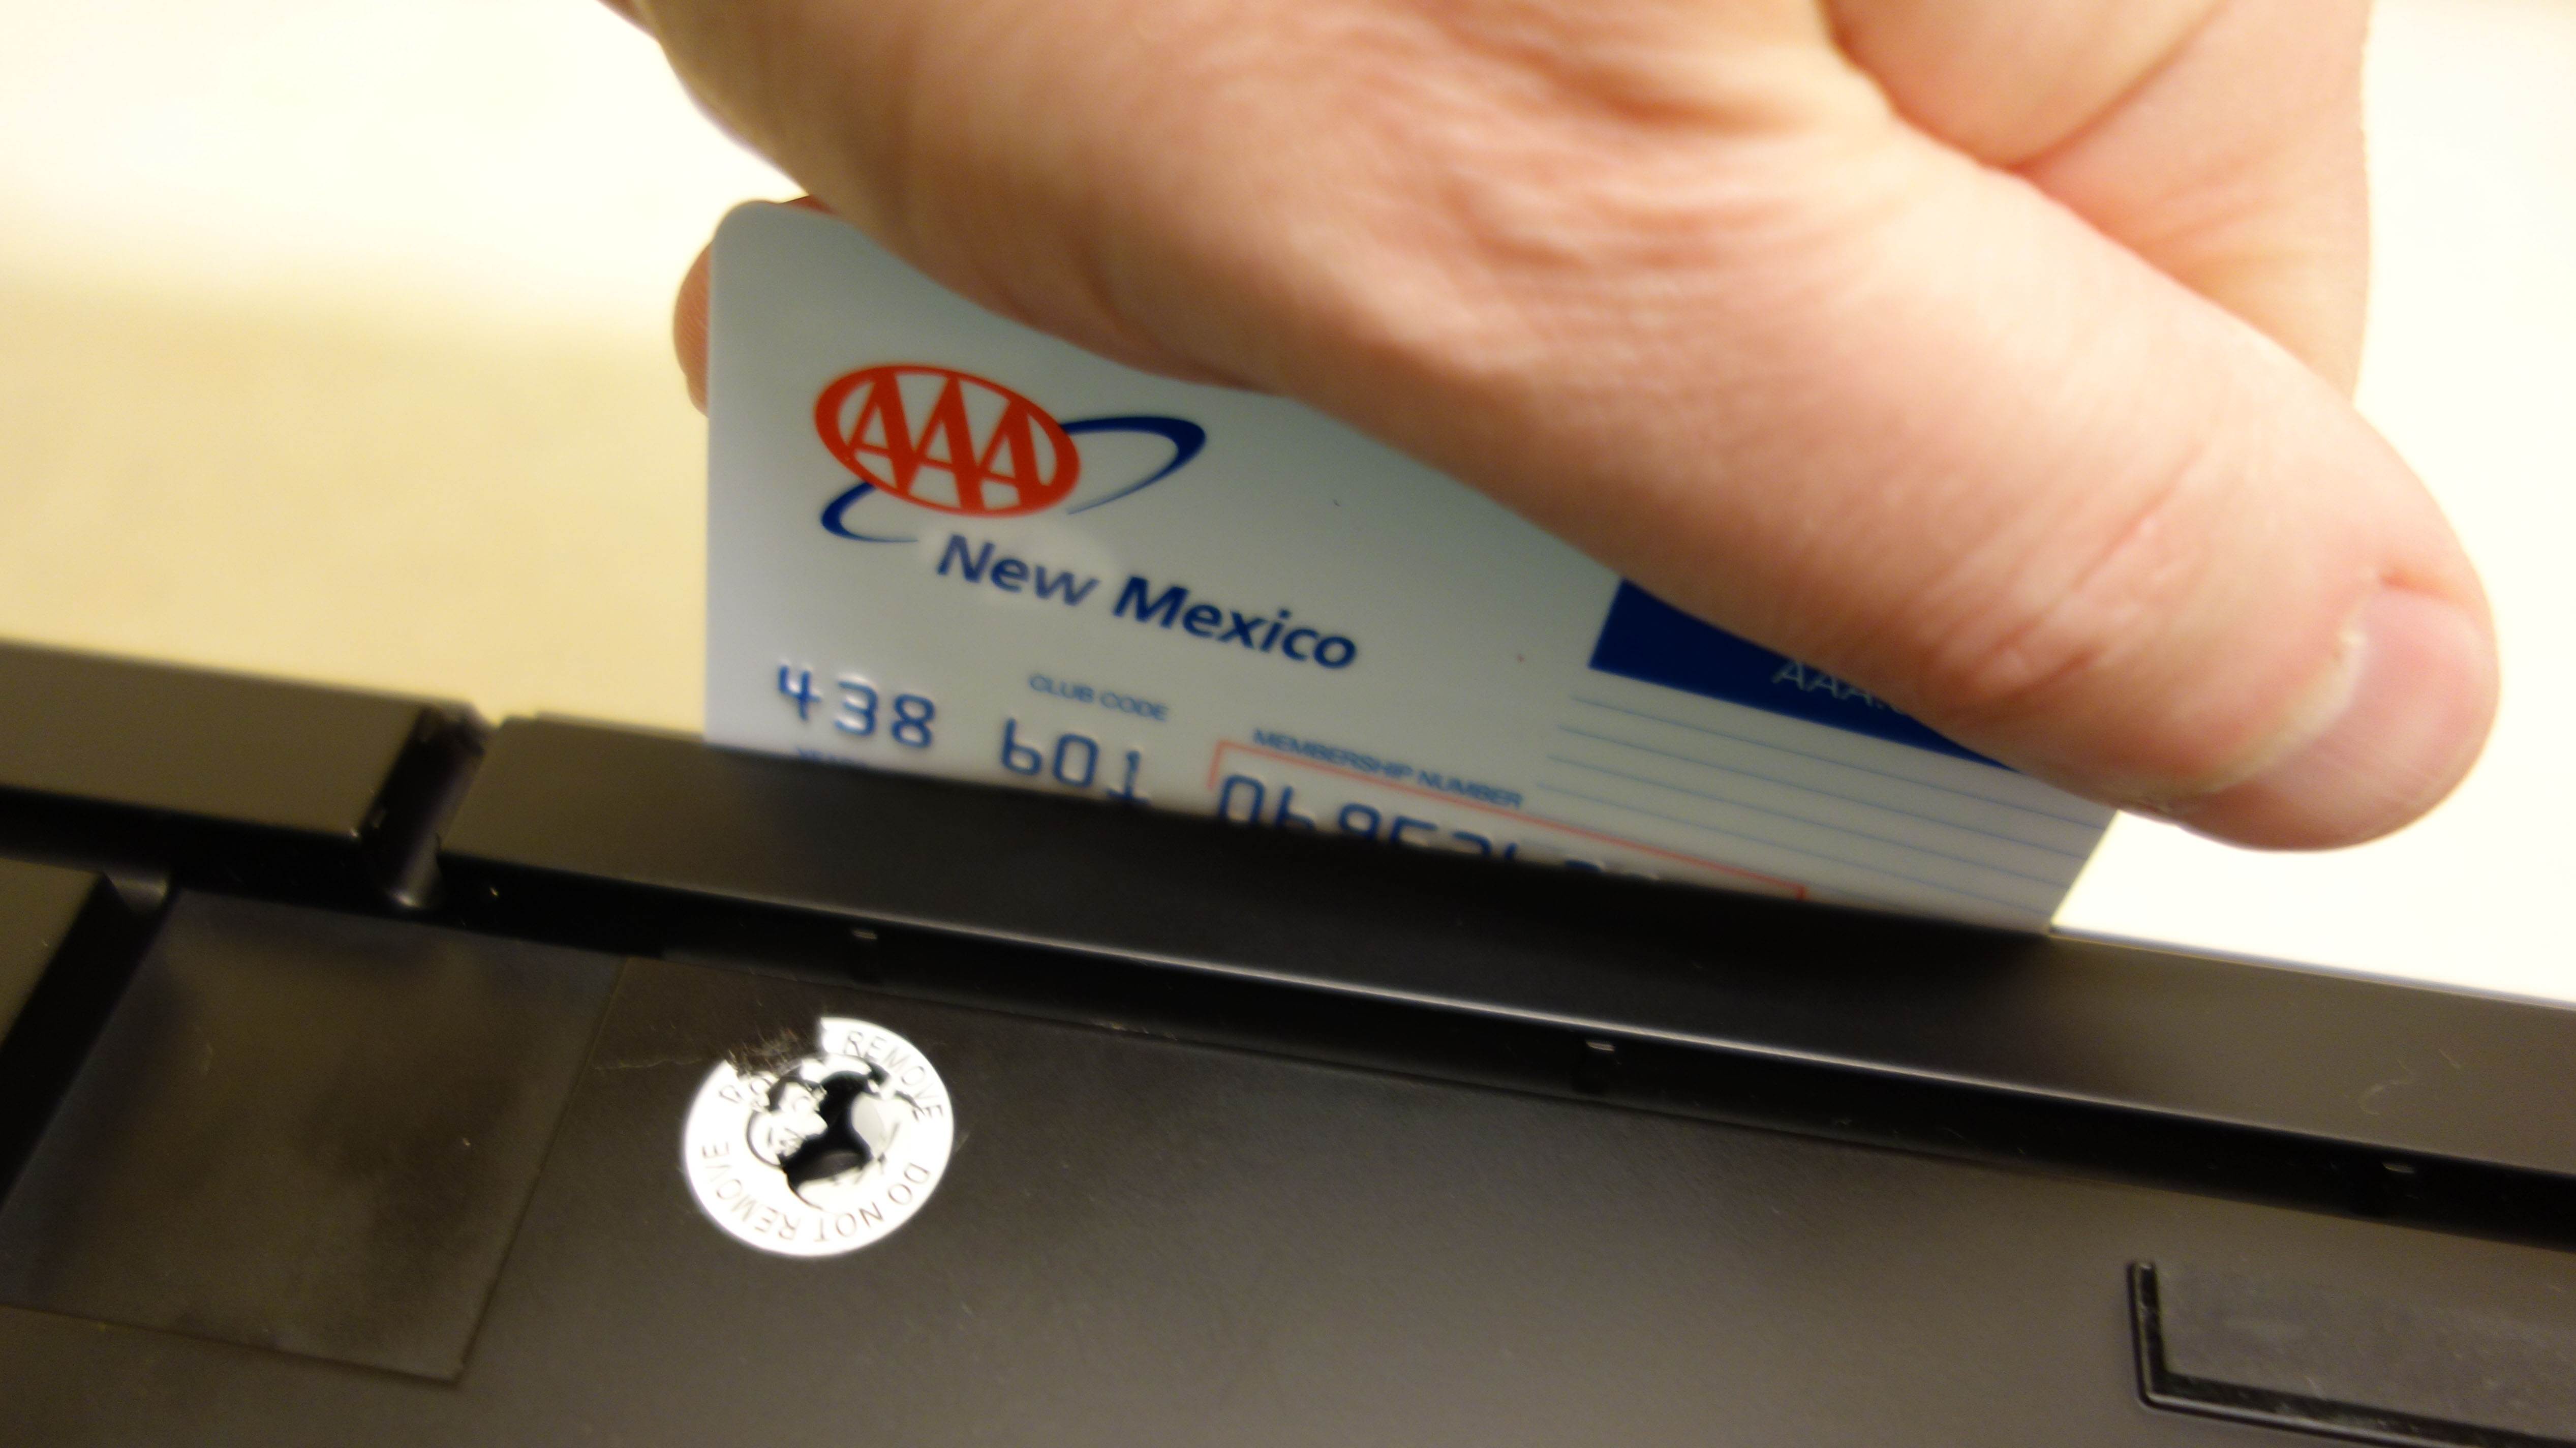
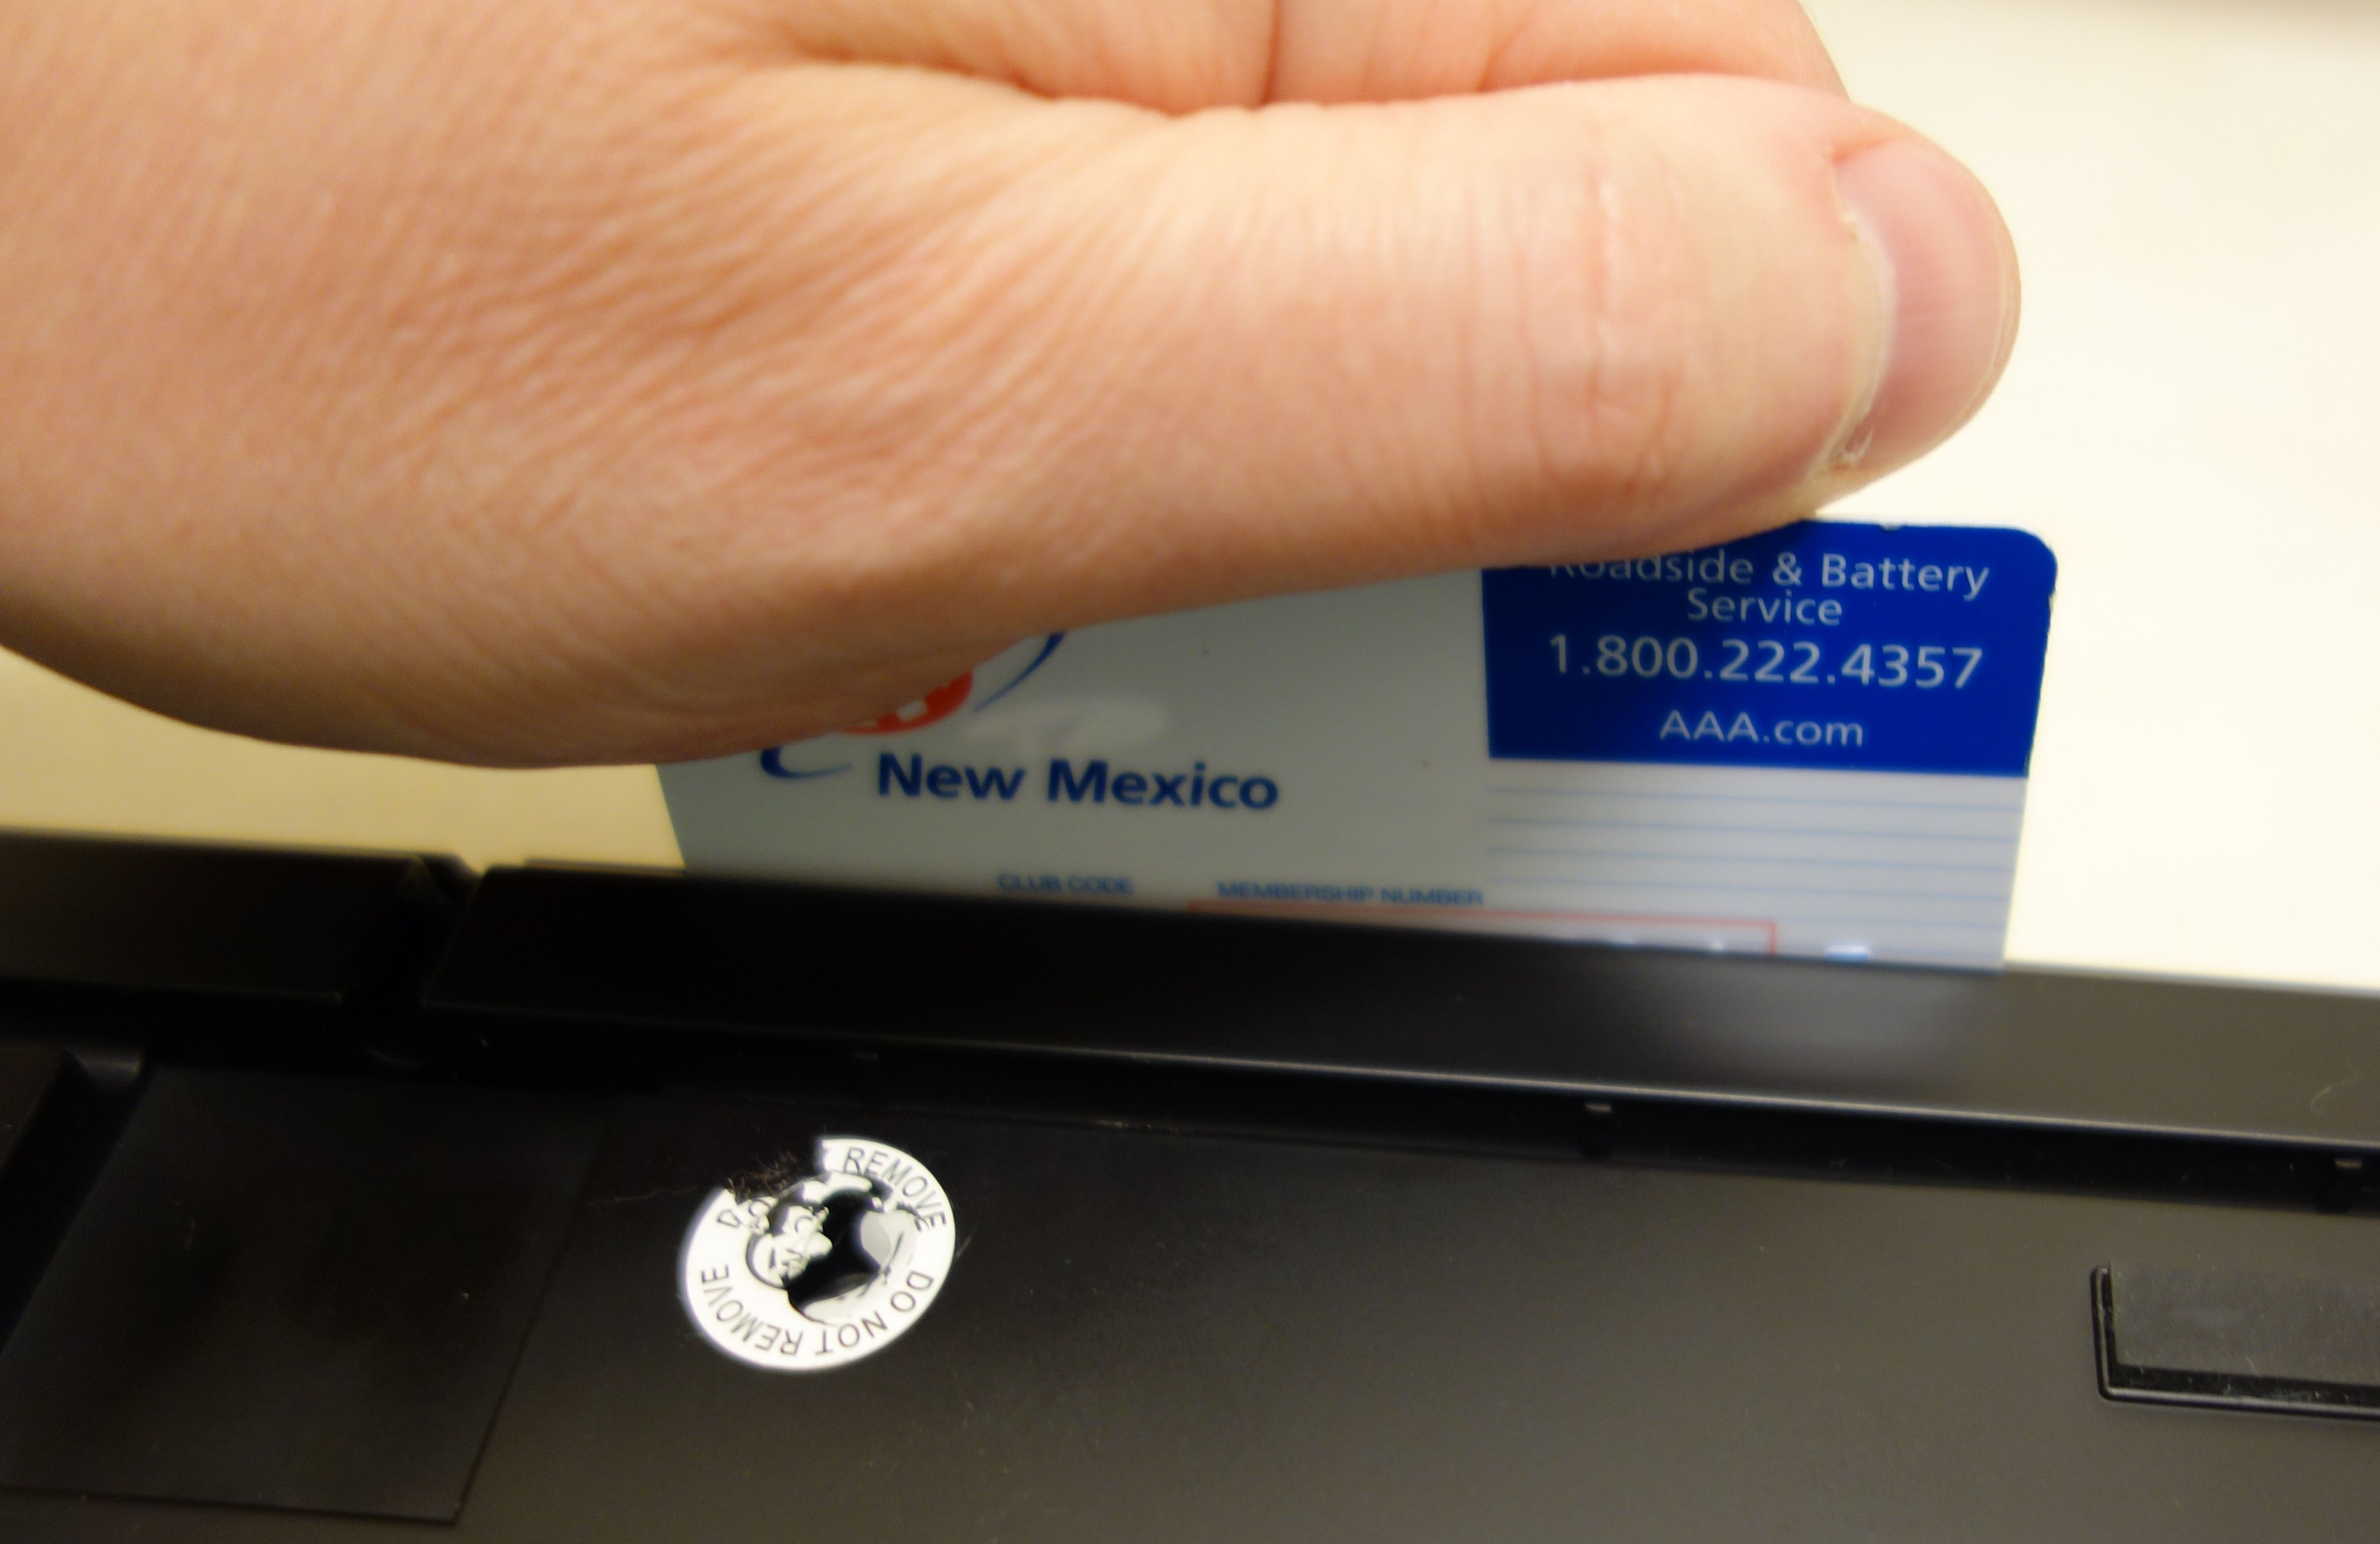
The tabs are hook shaped so that the keyboard clicks easily together at the factory but is much harder to pull appart. Pull on the upper and lower parts in order to open a small crack in which a credit card or similar can be inserted. If you plan on using the card again, mind the location of the card’s magnetic strip. In the location of the tabs, push the card in while wiggling it from side to side. Eventually, there will be a snap as the hook lets go. Rinse and repeat.
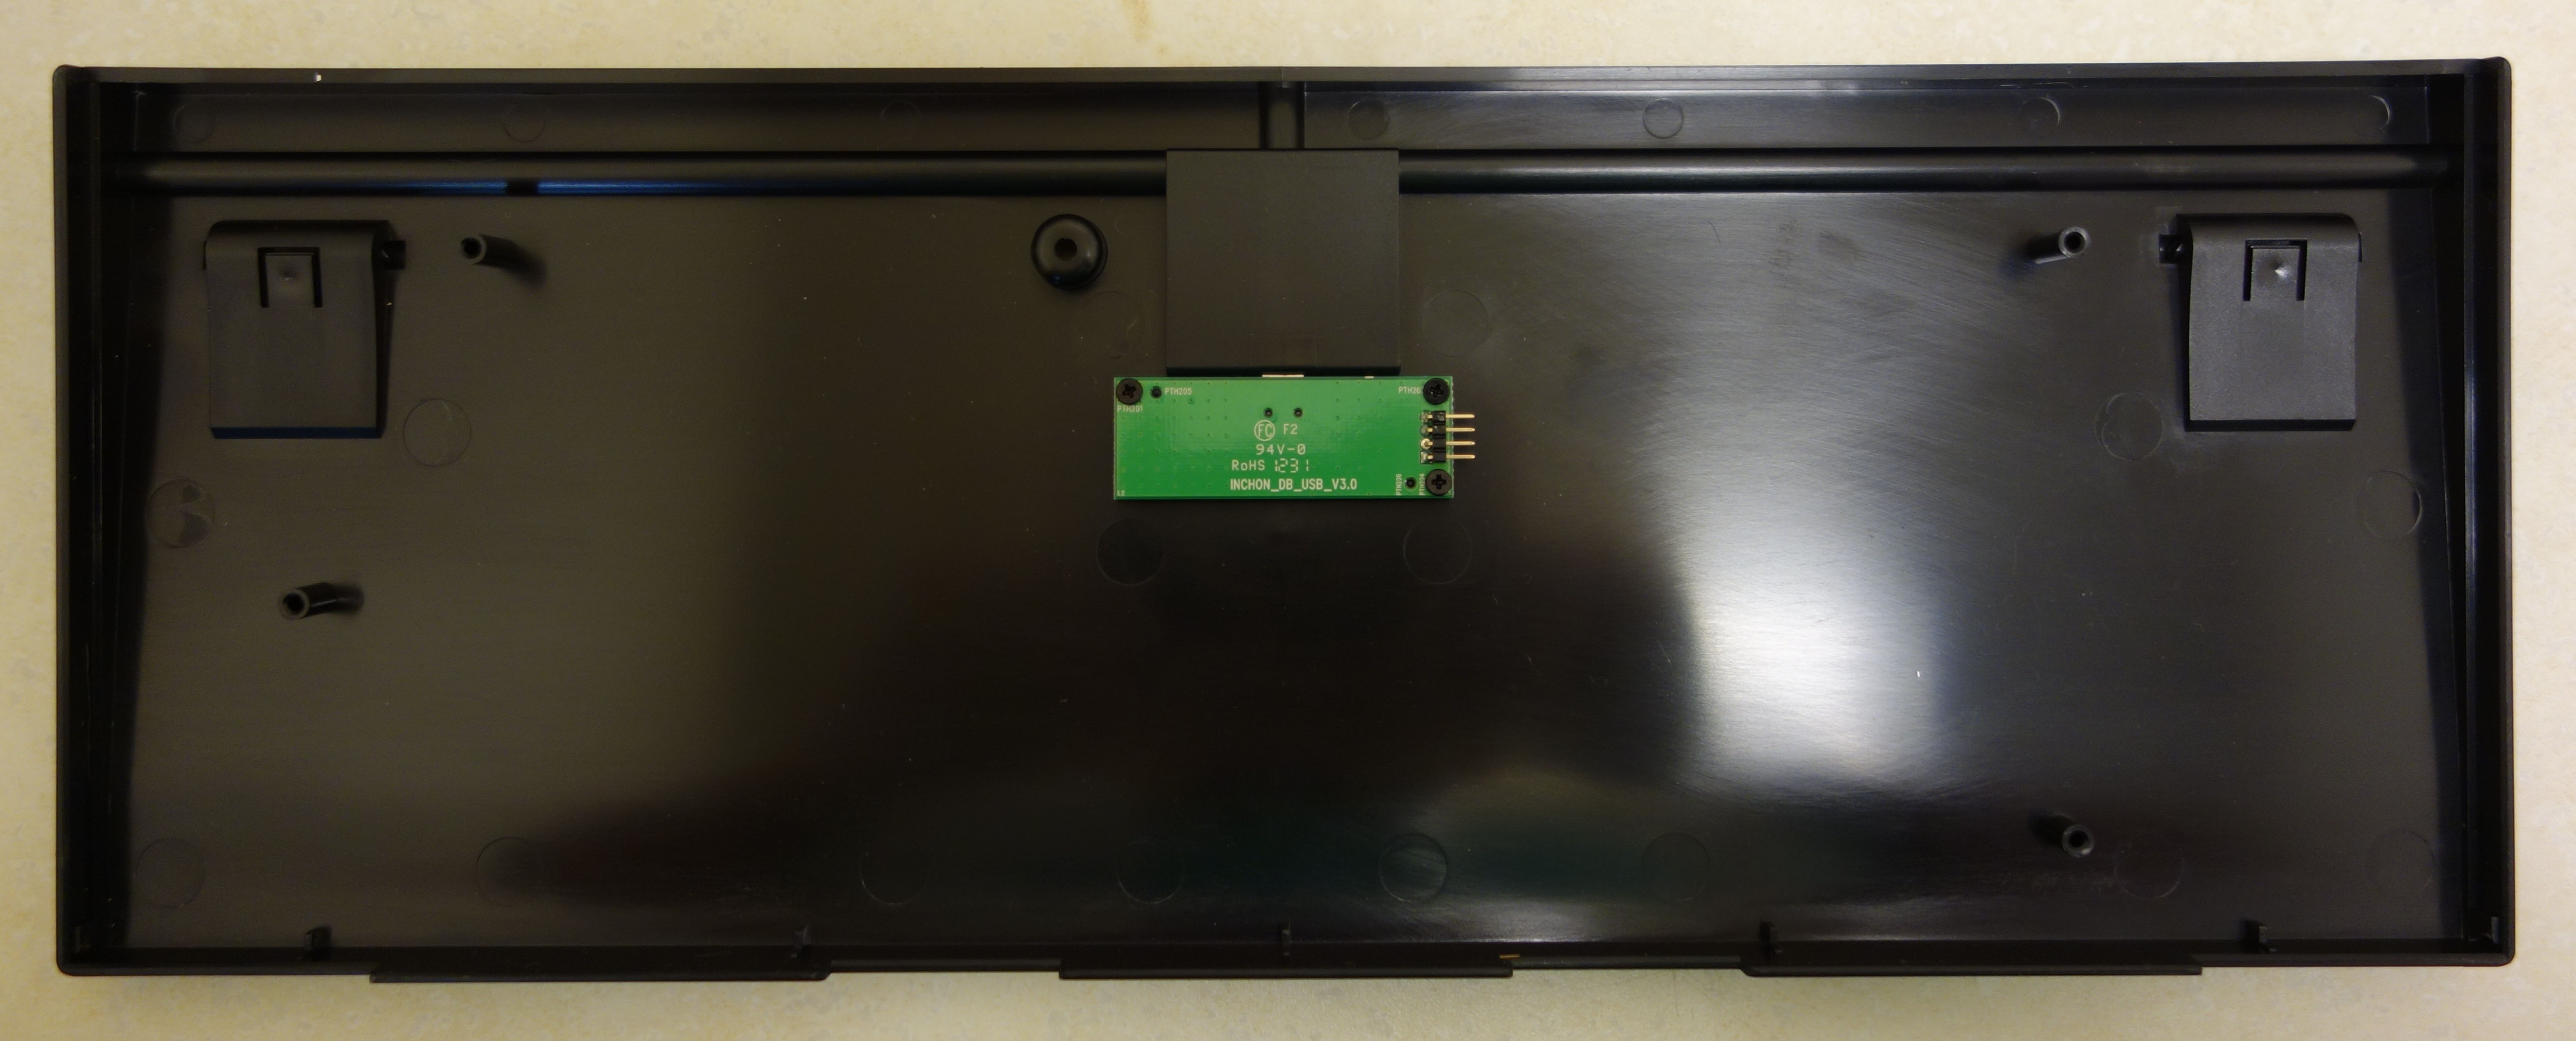
Top cover removed. When lifting the keyboard off the bottom cover, be careful to disconnect the daughter board.
Bottom with daughter board.
The location of the tabs in the front.

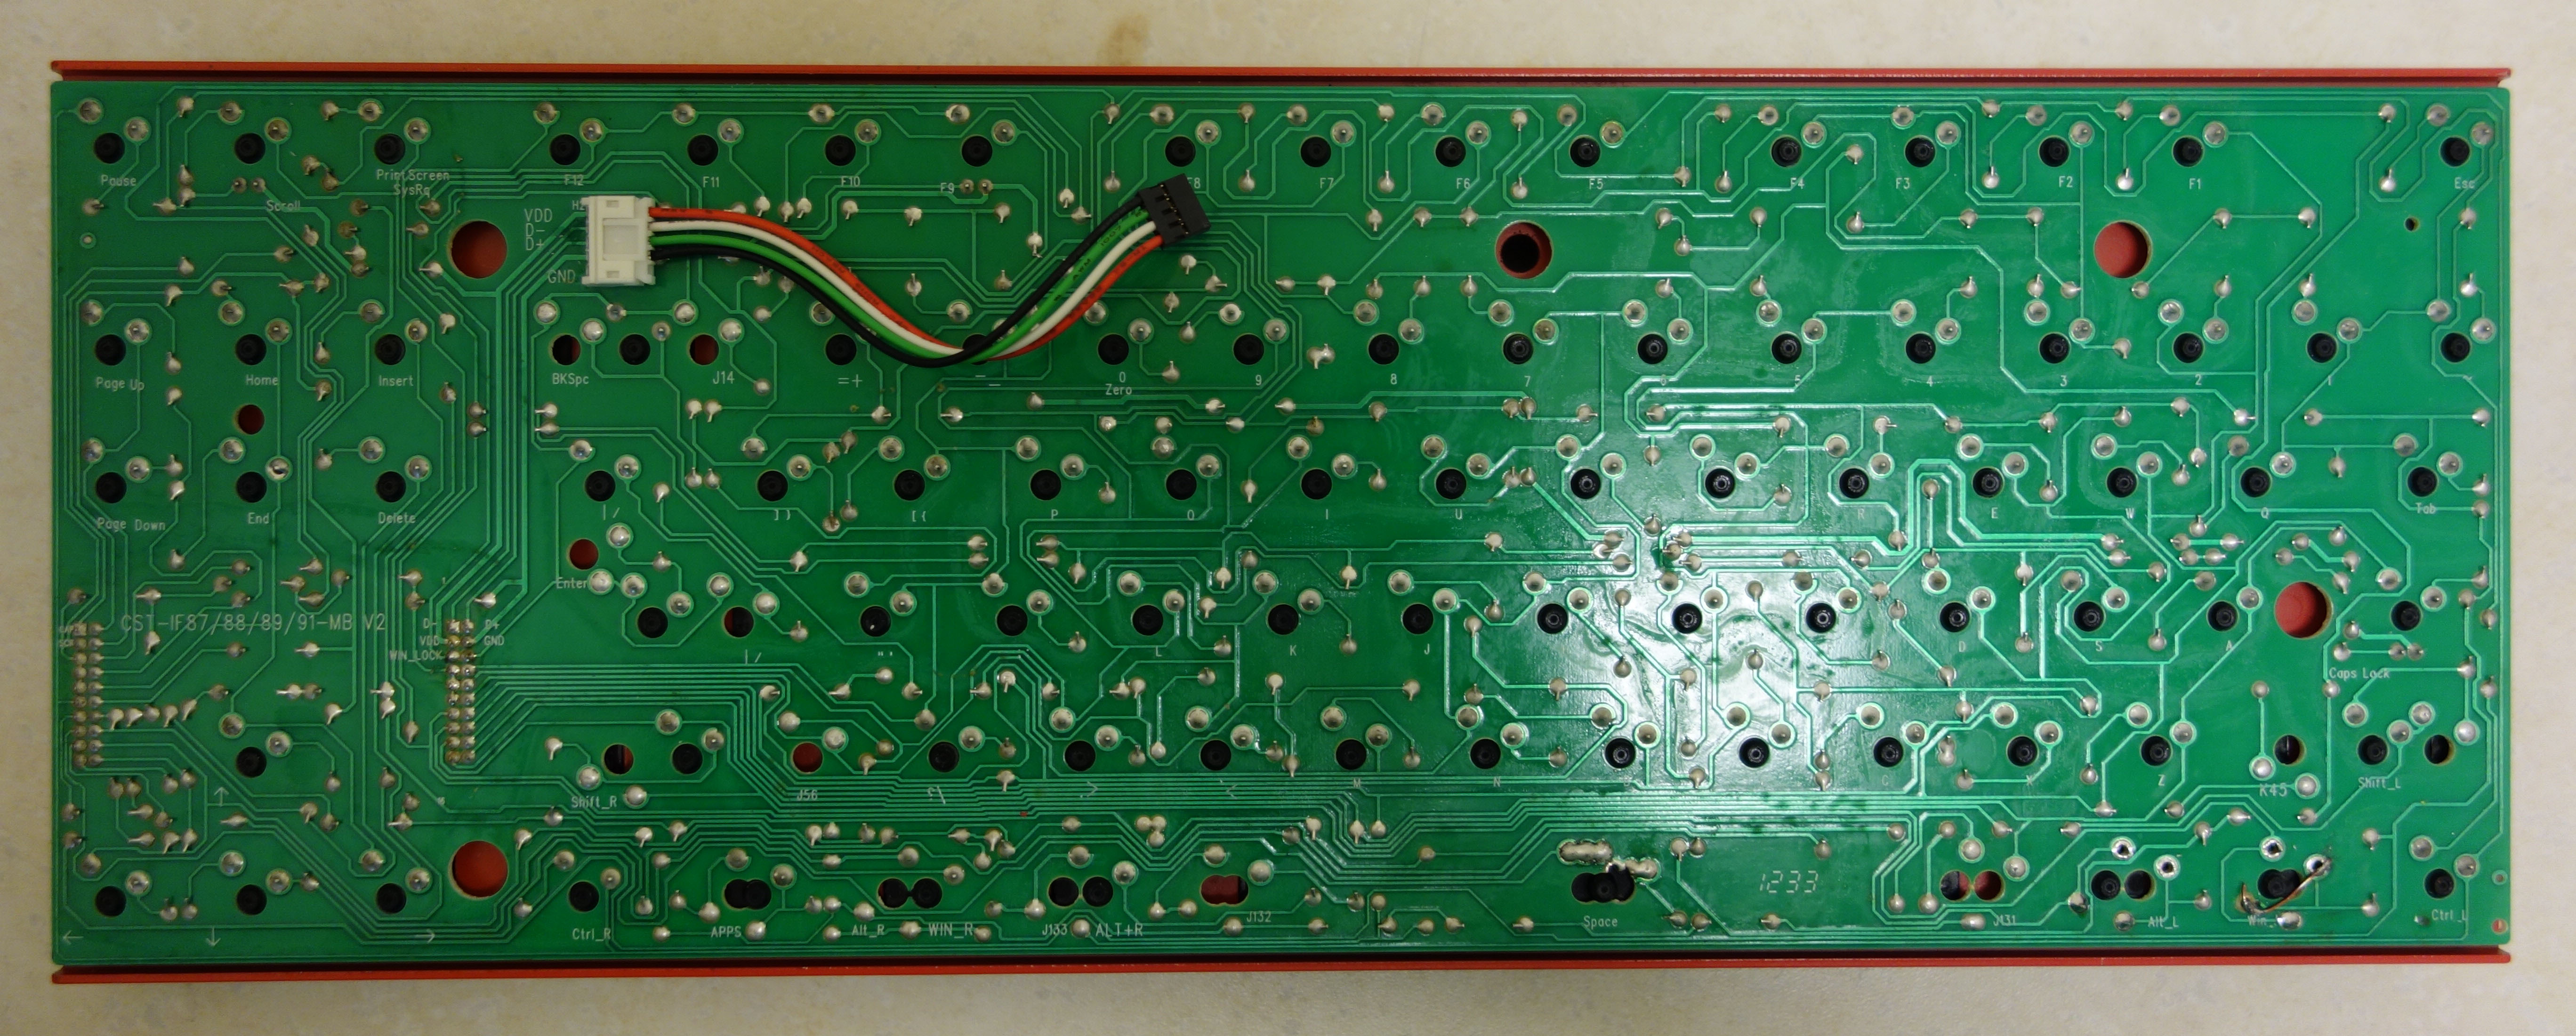
The circuit board has residue from manufacturing on it. This residue is not present on good quality boards. My bodge in the lower right corner.
Closeup of my bodge to fix the b0rked circuit trace that caused the key to work only intermittently.